Showing posts with label Chocolate. Show all posts

Wednesday, 12 December 2012

Bonus Post: Lil Ms Squirrel's Chocolate and Cherry Cookies - Food Blogger Cookie Swap

While I was on my mad blogging mission last year, I came across the Food Blogger Cookie Swap a day too late to participate.  In a nutshell, it's a postal 'Secret Santa' between food bloggers.  You bake three dozen cookies and send a dozen to three different people.  You get a dozen cookies from three different bloggers.  So unlike regular Secret Santa, you're never going to be disappointed with your gift.  Hopefully!

Ready for posting
So this year, I decided to take part but my new blog was too young at the final entry date so I had to enter via the 366 Recipe Challenge Blog instead.  I then used this as an excuse to try out several new cookie recipes, held a vote amongst my colleagues and the favourite biscuits were posted out to my (hopefully) lucky recipients.

In third place in the taste test were Dan Lepard's Ginger and Macadamia Cookies.  I had my heart set on using these for my exchange cookies, but there were mixed reviews from my co-workers.  Ginger is a bit of a Marmite flavour which divided opinion.  There was a complaint that they were too thin - they're chewy cookies so they spread a lot on cooking - and one person ate two together, thinking they were thicker than they were.  I then saved some of the dough to bake a few days later and managed to burn this batch so eventually decided not to risk attempting to bake thirty-six of them.

Freshly baked and drizzled
Second place went to another Dan Lepard recipe.  This time his Chilli and Almond biscuits.  I picked them because when people think biscuit, they generally think sweet and I wanted to be different.  You can read all about these over on my new blog 'How to Eat an Elephant'.

And the winning cookie?  Well originally, I was going to bake Nigella's Chocolate Mint Cookies as I liked the idea that they could be an alternative to After Eight's.  I had several half-used pots of chocolate chips in my cupboard so was merrily tipping them all into my bowl when I realised I'd mixed one of the half-empty pots with a load of left over dried cherries the week before when I'd been making my Chocolate and Cherry Bagels.  Luckily I'd not added the peppermint essence first.

As I had made all three batches of cookies on the one day, I'd also managed to run out of plain flour at this point so threw in a bit of pasta flour for good measure.  I think this made for a nice, soft cookie because when I made them with all plain flour for the actual Cookie Swap, they were a little crisper (although it might have been to do with me and my timings!)

Anyway, the cookies went down a storm at work in the taste test and when I took the leftovers from the ones I made for the swap in to work, there was a small scuffle as people rooted through the box seeking out the chocolate and cherry ones.

So here is the recipe, adapted Nigella's original recipe.


For the cookies

  • 150 grams butter (soft)
  • 225 grams light brown sugar
  • 1 teaspoon vanilla bean paste
  • 2 medium eggs
  • 150 grams plain flour
  • 75g 00 (pasta) flour
  • 55 grams cocoa powder
  • 3/4 teaspoon baking powder
  • 200 gram dark chocolate chips (I use Waitrose ones)
  • 100g dried sour cherries

To decorate

  • 75g white chocolate, melted
  1. Preheat the oven to 180°C/160°C fan/gas mark 4.  Lightly grease two baking trays with spray oil.
  2. Cream the butter and sugar.  Beat the eggs together with the vanilla bean paste then combine with the butter and sugar.
  3. Mix the flours, cocoa and baking powder in a bowl and gradually beat in to the creamed mixture. Fold in the chocolate chips and cherries.
  4. Scoop out walnut sized balls of mixture and space evenly across the baking trays.  You will probably need to bake in two batches.
  5. Bake in the oven for 12 minutes and then let them sit on the baking sheet for a couple of minutes before  moving them to a cooling rack. 
  6. Once cold, drizzle with the melted white chocolate.
And a massive thank you to Gill, Jen and Laura for the cookies they sent me!


Tuesday, 25 September 2012

Mary Berry's Chocolate Chip and Vanilla Marble Cake

"And now, the end is here, it's time to face the final curtain....I did it my waaaaaaay".  Poor Frank is probably spinning in his grave if he's listening to me wailing My Way as I type.  Here I am, a year on and 366 recipes tried, tested and blogged about.
Boxed up and ready for nursery

I'm on holiday from work this week so I let Miss A choose the final recipe.  Despite starting out with the mindset of changing the way my family eat, I made the rules elastic enough that I could indulge my new-found passion for baking over the past year.  With a rainy day ahead, it seemed the fitting way to end the blog - doing something with Miss A who has also discovered a passion for baking this year.

At the weekend she made a cake under her grandmother's expert eye for my mum's boss.  He still won't believe that she did pretty much everything herself apart from putting it into the oven and taking it out.  And today, she eagerly participated in the marble cake making.
Expert drizzling by my two-year-old

I must admit to being a little impatient at some of the things she's picked up from CBeebies such as the sugar-shuffling, big and small mountains and scooping and sliding with 'John and Millie' the spoons, but I'm so proud that she can work with big numbers, crack eggs, knows what a lemon zester is for and is aware of the perils of the kitchen already.

Now the need to do something new every day has evaporated, we will be practising making all manner of things from my the two childrens cookbooks that I own to try and broaden her horizons and repertoire further.  I only hope this year has been a good experience for her.

As for the cake, the tag line says that "children particularly enjoy the fun of making marble cakes".  That was true this morning.  It didn't do much for my blood pressure though as the kitchen was marbled with chocolate cake mix.  After a good spring clean, we covered the cooled cake in white and dark chocolate drizzle and the kitchen was once again marbled in chocolate.

This was one of Berry's really easy bakes - an all in one mix which you then divide into vanilla and chocolate.  It bakes really well and is probably pretty failsafe.  Although it makes masses of cake.  I managed to divide it into 28 generous pieces.  Miss A wanted to make it to take to nursery for her teachers but there's enough to share around all her friends too if they divide the slices into two for the children.

The recipe is from 100 Cakes and Bakes which I bought to take part in the Weekly Bake Off - something I'll hopefully be doing a bit more now this year is over.

I can't find the recipe online to share, but the book is only about a fiver on Amazon and well worth it.  I will say that I preferred Dan Lepard's Chocolate Crumb Marble Cake with its indulgent top, but for speed, this is definitely a great bake to make.

So that's it.  Well nearly.  There'll be one more post some time this week when I answer questions from The Last Post - feel free to drop by and add a comment if you have any questions you'd like to ask me about this year.  Otherwise, thanks for reading!

Saturday, 22 September 2012

Thomasina Miers' Churros y Chocolate

This recipe has been on my to-do-list ever since I first got my grubby mitts on a copy of Thomasina Miers' Mexican Cooking Made Easy (my second favourite book after Dan Lepard's Short and Sweet) and I knew that if I didn't make it today, I probably never would.
Just a light breakfast

It's the kind of thing that you a) have to share with other people and b) couldn't cook in my house because the husband would freak out about the thought of all that hot oil catching fire.  So I decided to make it whilst visiting the Mothership as I knew she'd just about trust me to cook it by myself (see last night's brandy episode) and that my stepdad would do the honours and eat every last scrap.

The recipe supposedly makes 16 3-4" churros and I did consider only making half of the batter but figured that four each would be about right.  In the end, I must have had about 24 3-4" ones (and they all went).  It also makes far more chocolate sauce than it's humanly possible to eat at that time of the morning - but of course that will keep for another time or can be chilled and turned into truffles.

Mount Churros
Aside from the faff of deep frying, the recipe is simplicity itself.  The batter is just flour, oil and water;  the sauce a simple ganache of dark and milk chocolate*, double cream and golden syrup; the "sprinkly bit" cinnamon and caster sugar.  There's no need for a deep fat fryer to cook them - I did mine in a wok filled one-third full with oil.  You just need to be a bit dextrous trying to snip the batter from the piping bag when it's hanging over a pan of hot oil.  I had a couple that stuck together as the previous one floated into the path of the new one I was squeezing out but other than that, everything went to plan.

The only other tip is to either keep the pre-cooked ones warm whilst cooking the others or to serve them to people shortly after draining.  I made all mine first and so the last few were a bit icky when cold but the chocolate sauce definitely made up for it.

I would definitely make these again if I ever had a crowd to feed.  Which will be never.  But definitely worth the effort if you fancy a treat.  If you don't own a copy of Mexican Food Made Easy (then go buy one!) you can find the recipe here.

*It did feel slightly wrong cooking with 250g Finest Peruvian chocolate at 8am.  But only slightly!

Tuesday, 4 September 2012

Dan Lepard's Dark Chocolate Berry Cake

There are a few things that I've tried several different recipes for over the course of this year in the hope of finding the perfect recipe.  I've found my favoured recipes for naan bread, vanilla cupcakes, lemon cake and meatballs (this is a cheat because we settled on Waitrose ones).

Poor lighting - taken at 4.57am!
But good chocolate cake has eluded me.  Pre-blog, I had made Angela Nielsen's Ultimate Chocolate Cake and after a disaster with a vanilla cake, it gave me a back up base cake for this challenge.  I then tried Nigella's chocolate cake  which I really wasn't a fan of.  I had a disaster with Dan Lepard's Brown Sugar Chocolate Cake and a similar crisis with a chocolate and clementine loaf cake that Miss A and I tried to make the other day that I was too embarrassed to blog about.

So today, having made a bargain with Miss A that if she'd make a lemon cake for my Grandad's birthday on Saturday (he hates chocolate cake, she believes that all birthday cakes should be chocolate), we set about trying Dan Lepard's Dark Chocolate Berry Cake for me to take in to work tomorrow for my lovely colleagues on my Business Process Excellence course.

Having made a deal with the trainer that if we finished by 4pm today, I'd bring in cake tomorrow, I was a little nervous that I'd have a further disaster (I'm touching my laminate floor in the hope I don't now jinx myself and drop the darn thing on the way into work in the morning!).  But so far, so good.


I nearly forgot the butter - which is the very first ingredient - but managed to redeem myself at the last minute.  Then I didn't realise that if you start the timer on my mobile phone and then plug it in to charge, it stops the timer.  Thankfully I'd double checked the time on the cooker clock when I put the cake in so I was able to work out how much longer it needed and now it's nicely risen and cooling in the tin.
Hutch plays mother

Of course, by the time it's completely cooled I will have to be in bed, meaning that I need to ice it first thing in the morning.

My only comment (so far) is that the instructions are a little scant for the novice.  For example, with the icing, it doesn't tell you to melt the chocolate in a bain marie.  I'm partly tempted to do it straight in the pan but I could do without a burnt chocolate crisis at 5am.  Nor does it tell you how to cool the cake - in the tin or on a rack?  I'm going for the in the tin method.

Keep your fingers x'd for me and I'll update the post tomorrow with a picture of the finished article and some feedback.

You can find the recipe here.

Updated 5th September 2012 @ 19:58

Having gotten up at 4.30am to ice the cake this morning, I'm afraid it's not particularly photogenic and the picture is poorly lit.  However, I'm loving the chocolate icing with the subtle hint of berry coming through from the jam.  I used cherry jam with mine and I absolutely recommend buying the Mirabel jam that you can get in Lidl which I used for my cherry Viennese whirls.  It has a really strong, sharp cherry flavour and cuts well through the chocolate.  I find English cherry jams far to sweet and I think they'd be lost in the richness of the frosting.

One miniscule criticism is again surrounding the food photography.  This time, it's the Guardian's website.  The stylist seems to have used a buttercream type frosting rather than the chocolate/jam/icing sugar version that Lepard suggests.  The icing in the official picture is very smooth and thick, showing no hint of cherries lurking in it - which is a shame.  Or maybe they just used a sieved cherry jam?  Nobody's ever going to taste that picture so they probably only cared that it looks aesthetically pleasing.  And in this instance, there's no picture in Short and Sweet to compare it to as the recipe isn't in the book.

Anyway on to the reviews.  My chief cake tester is on his holidays at the moment.  The second in command (on the cake testing front) gave it the seal of approval, as did the rest of the course delegates and the assorted managers who came to review our final presentations.  In fact, I've now been invited to attend twenty training sessions taking place between now and Christmas by one manager who was told that I always take cake when I got to a training session.  He'll be lucky!

My personal opinion from the tiny sliver I had was that it was a good, flavoursome, solid cake that would stand up to a wide variety of fillings and could probably slice well into a three layer cake.  It was a little drier than I would've liked which is purely my own fault.  Partly because of the timer issue (see above) and partly because I was trying to juggle Miss A into bed around the time it was due out of the oven so it got a few minutes more than it should have had.

Nevertheless, I will definitely be making this one time and again.  Chocolate cake recipe?  Sorted.

And finally, thanks to Hutch who got press-ganged into having his pic taken for the blog - just to prove I don't eat all the cake myself!

Wednesday, 27 June 2012

Cooking for Kids: Fruit Skewers

When we get back from holiday, the husband is starting a new healthy eating regime, coupled with a stupidly intense exercise regime.  I've been handed the manual and informed that I am responsible for making sure that he has a six pack like Ben Shepherd's (if you've not seen him recently, check out these pics of him in Men's Health - shame he's a bit little)

Some of your five a day
I'm sure, if he puts his mind to it, he could get most of the way there.  When I first knew him, he used to lift weights every day and had really big arm muscles for someone who was pretty slim.  Since we moved to the countryside, he's become more sedentary and the dumbells are coated in a serious layer of dust in the garage.  But the biggest challenge will be the food.

It involves very little carbs, lots of protein and lots of fresh fruit and veg.  The only veg the husband eats is bell peppers when we have fajitas (chopped toms, onions and garlic made into sauce doesn't count in my book).  He keeps saying 'it's only eight weeks'.  I'm afraid we won't get past day two.  Every so often, he'll inform me I don't feed him enough vegetables.  I stock up on broccoli, asparagus, peas etc and by the end of the week, I'm making soup for me with it and he's back to no veg at all.

Miss A is just like him in that respect; but when it comes to fruit, she's like a little fruit bat.  I've never seen a child willingly eat so much fruit as she does - all varieties (except Dragon Fruit).  The husband, on the other hand, only eats bananas.  And apple turnovers.  Only if they're accompanied by ice cream.

So I figured that this would be a good, simple, sharing family recipe for holiday.  Chop up loads of fresh fruit.  Stick it on skewers.  Drizzle with maple syrup and melted chocolate.  Eat.  Job done.  Why did I not think of this before?

Sunday, 17 June 2012

Dan Lepard's Easy Chocolate Birthday Cake

So right now, we're in hopefully (sunny) Scotland and by the time you're reading this, we will have produced a stunning Father's Day cake for the husband.  With it being our seventh wedding anniversary tomorrow as well, I figured what better way to tick off a new recipe than to bake a celebratory chocolate cake.  This also helped justify why I needed to pack my sandwich tins for holiday.

Artfully decorated by Miss A with giant jazzes
We always take basics with us to cope with the first night just in case we don't make it to the supermarket - normally Weetabix, bread, frozen milk (it can defrost on the way) and a few other odds and ends.  Our favourite Scottish hideaway used to have a well-stocked pantry of basics left by previous visitors but this new location is an unknown quantity so I included all of the dry ingredients weighed out already and then threw in my scales too - just in case neither location had a set.

Then it just needed a quick trip to the local shops for eggs and cream and some magic from Miss A and hopefully at some point during this week, I'll be able to furnish this pre-written post with a picture of the finished cake.

In the meantime, here's a link to the recipe online.


Updated 17th June 2012 @ 21:10

There's just something about me and chocolate cakes (excluding brownies) that just don't seem to be working well together on this blog.  When we finally arrived at our destination, I realised that despite ticking them off from my holiday packing list, I actually forgot to bring my scales with me.

My holiday packing list
Unfortunately, the scales at the cottage are a bit hit and miss (although if I'm honest, my own scales are temperamental) and so this cake was destined from the start to not be perfect.  Add to that my decision to halve the recipe and baking in an unfamiliar oven; plus, not checking that the batter was evenly spread in the pan, I was lucky it even resembled a cake.  And because I was so worried about it sinking, I didn't dare look at it until 25 minutes had passed.  By which time it was cooked, but a little dry.

Lepard's cake is stuffed with whipped cream and jam before being slathered in chocolate icing.  Because we already had an amazing cake in our holiday fridge on arrival (more on that another night - it deserves its own special post), I decided to cut down on the cream and just make a simple ganache for Miss A to spread over the top of the cake.

The flavour of the cake was really good.  It just probably need a little less time in the oven and a little more filling/topping to disguise it's dryness.  Miss A was really proud of her efforts and it was a good recipe to allow her to help with every single stage, apart from melting the butter and heating the cream for the ganache.

I owe it to this recipe to bake it in its true form another time.  In the meantime, I'm off to polish off some more of the other cake before falling into a sugar-induced coma.  Laters!

PS: It's been mostly raining with a tiny glimmer of sunshine!

Sunday, 3 June 2012

Honeycomb Shortbread Rounds

I officially declare this weekend 'The Weekend of the Drizzle'.  Not just because it rained on the Queen's Diamond Jubilee Pageant today, but because my weekend cooking has been covered with it.

Friday saw my Diamond Jubilee Lemon, Blueberry and Raspberry Bundt, drizzled in red, white and blue lemon icing.  Yesterday, mushrooms drizzled on sourdough toast (tenuous!).  Today, it was the honeycomb shortbread rounds' turn to get drizzled in chocolate.  Tomorrow, it will hopefully be miniature pavlovas, drizzled with spiced rhubarb compote.  From Tuesday, I must return to the diet.

Tomorrow we're off on a surprise visit to my Grandad's cousin.  It's her birthday on Tuesday and she's a huge fan of my biscuits and truffles, so I had the ideal opportunity to try something new for her as a gift.  Her favourites are shortbread, so I decided to give them a little twist.  Normally, I'm a woman of simple tastes and like my shortbread plain or with chocolate chunks in.  But in-keeping with the blog, I found myself a recipe for honeycomb shortbread.

Drizzle-tastic
It's a typical shortbread recipe with a ratio of 2 parts flour to one part sugar and one part butter.  The key thing here though is to use really good quality ingredients.  It must be butter for biscuits - no margerine.  And vanilla bean paste makes all the difference compared to extract.  In such a simple biscuit, there's no hiding behind inferior ingredients.  The better ingredients you can afford, the better it will taste.  It's not always the way with cake, but you will definitely notice the quality ingredients in a biscuit.

You can substitute a fifth of the flour for cornflour to make them shorter or ground rice to make them a little crunchier.  And then you just stir in 50g of honeycomb pieces.  I cheated and used ready-bought from Sainsburys but Nigella has a fabulous recipe if you want to eat some (and rot your teeth in the process).

Finally, for a bit of showiness, I drizzled them with melted, plain chocolate.  In the morning, they'll be put into a gift bag and delivered to Auntie Pam.  I don't expect them to last more than a day!

Recipe - Adapted from Cook (Almost) Anything Once


  • 125g softened butter
  • 125g caster sugar
  • 1 large egg, lightly whisked
  • 1/2 tsp vanilla bean paste
  • 1/4 tsp table salt
  • 200g plain flour, sifted
  • 200g cornflour
  • 50g honeycomb, roughly crushed
  • 50g plain chocolate


  1. Beat the butter and sugar until light and fluffy.  Mix in the egg and vanilla bean paste until well combined.
  2. Mix in the flours and salt until it forms a soft dough.  Divide into two and shape into logs, around 4cm in diameter.  Wrap tightly in cling film and refrigerate for at least two hours.
  3. Preheat the oven to 180c/160c fan/350 fan.  Line two baking trays with baking parchment.
  4. Remove the biscuit logs from the fridge and cut into rounds about 8mm thick.  Place on the baking sheets, spaced apart to give them room to spread.  Bake for 10-12 minutes.
  5. Cool the biscuits on the trays for 10 minutes then move carefully to a cooling rack until completely cold.  Keep the parchment lined baking sheets.
  6. When the biscuits are cold, gently melt the chocolate in a bowl placed over some simmering water (don't let the water touch the bottom of the bowl).  Pour into the corner of a ziploc bag, snip off a tiny piece of the corner and drizzle the chocolate over the biscuits.  Leave until the chocolate is set then package.


Sunday, 27 May 2012

Lil Ms Squirrel's Fully Loaded Brownies

Today Miss A and I are off to the Love Food Festival at Dyrham Park.  I've been wanting to go to one of these events for ages, but haven't been able to convince the hubby to come with me.  They're normally held in Bristol or Bath at an open market place and this worries me with my wayward toddler on the loose with only one parent supervising (ie I won't be able to look at anything because I'll be making sure she doesn't accidentally run out into the road or something).  Whereas the Dyrham Park event is at a big old stately home so there'll be plenty of space for her to race around before I pop her in the buggy and push her round for a bit while I browse the gorgeous wares on offer.

Made by my beautiful assistant
Sunday is also running and swimming day, things were a bit mental this morning as we prepared for the off.  On Friday, the husband asked Miss A to make him brownies and she's been pestering me ever since to let her do this so I figured we'd fit it in between getting back from swimming and going out to the food festival.  For once I was uber-prepared with all the ingredients weighed out ready in little bowls so we just had to mix, bake and then go.

I wanted to do something a bit different with these brownies.  As nice as my favourite recipe is, I wanted something a little more adventurous.  Rooting through the cupboards, I realised I didn't really have enough of any one ingredient or even two different ingredients so I decided I'd just weigh out 200g of random things and throw it into the mix.  Hence fully loaded.  I went for marshmallows, dark and white chocolate chunks, pistachios and dried cherries.  And it worked really well.

The marshmallows gave the brownies a really chewy texture, the chocolate chunks added bite.  There was a little crunch and a great green colour from the pistachios and a sharp tang from the cherries.200

When the husband finally got to sample one, he then revealed that what he actually wanted was my signature whoopie pies (chocolate with Baileys cream in the middle), not brownies.  He thought because they were brown they were classed as brownies.

Hey ho.  Well at least I got a new recipe out of today!  And here it is:

Recipe - Makes 16

  • 200g 40% plain chocolate (something like Bournville will do)
  • 175g butter
  • 3 eggs
  • 175g caster sugar
  • 1 tsp vanilla bean paste or vanilla extract
  • 75g plain flour
  • 1 tsp baking powder
  • 2 tbsp cocoa powder
  • 200g mixed fruit, chopped nuts and sweet things of your choice
  • 20cm square cake tin, lined
  1. Preheat the oven to 190c/170c fan.
  2. Chop the chocolate and butter into small pieces, place in a glass bowl over gently simmering water and stir until just melted.  Set aside to cool.
  3. Lightly beat the eggs with the sugar and vanilla.  Stir into the cooled chocolate mixture.  
  4. Sift the flour, cocoa and baking powder into the chocolate mixture and stir well until just combined.  Mix in the fruit, nuts and sweets.
  5. Pour into the cake tin, level the top and bake for forty-five minutes.  The cake should be just about set with a slight wobble in the middle.  If you use marshmallows, the edges and top are likely to be a little crispier than normal brownies.
  6. Cool completely in the tin and then cut into sixteen pieces.


Sunday, 20 May 2012

Dan Lepard's Brown Sugar Chocolate Cake

I'll be honest with you.  I got cocky.  Having made 26 other Dan Lepard recipes, I figured I could write the best part of this blog before even attempting the cake and then just stick in some pictures when it was finished and get an early night.

To sink one is careless...
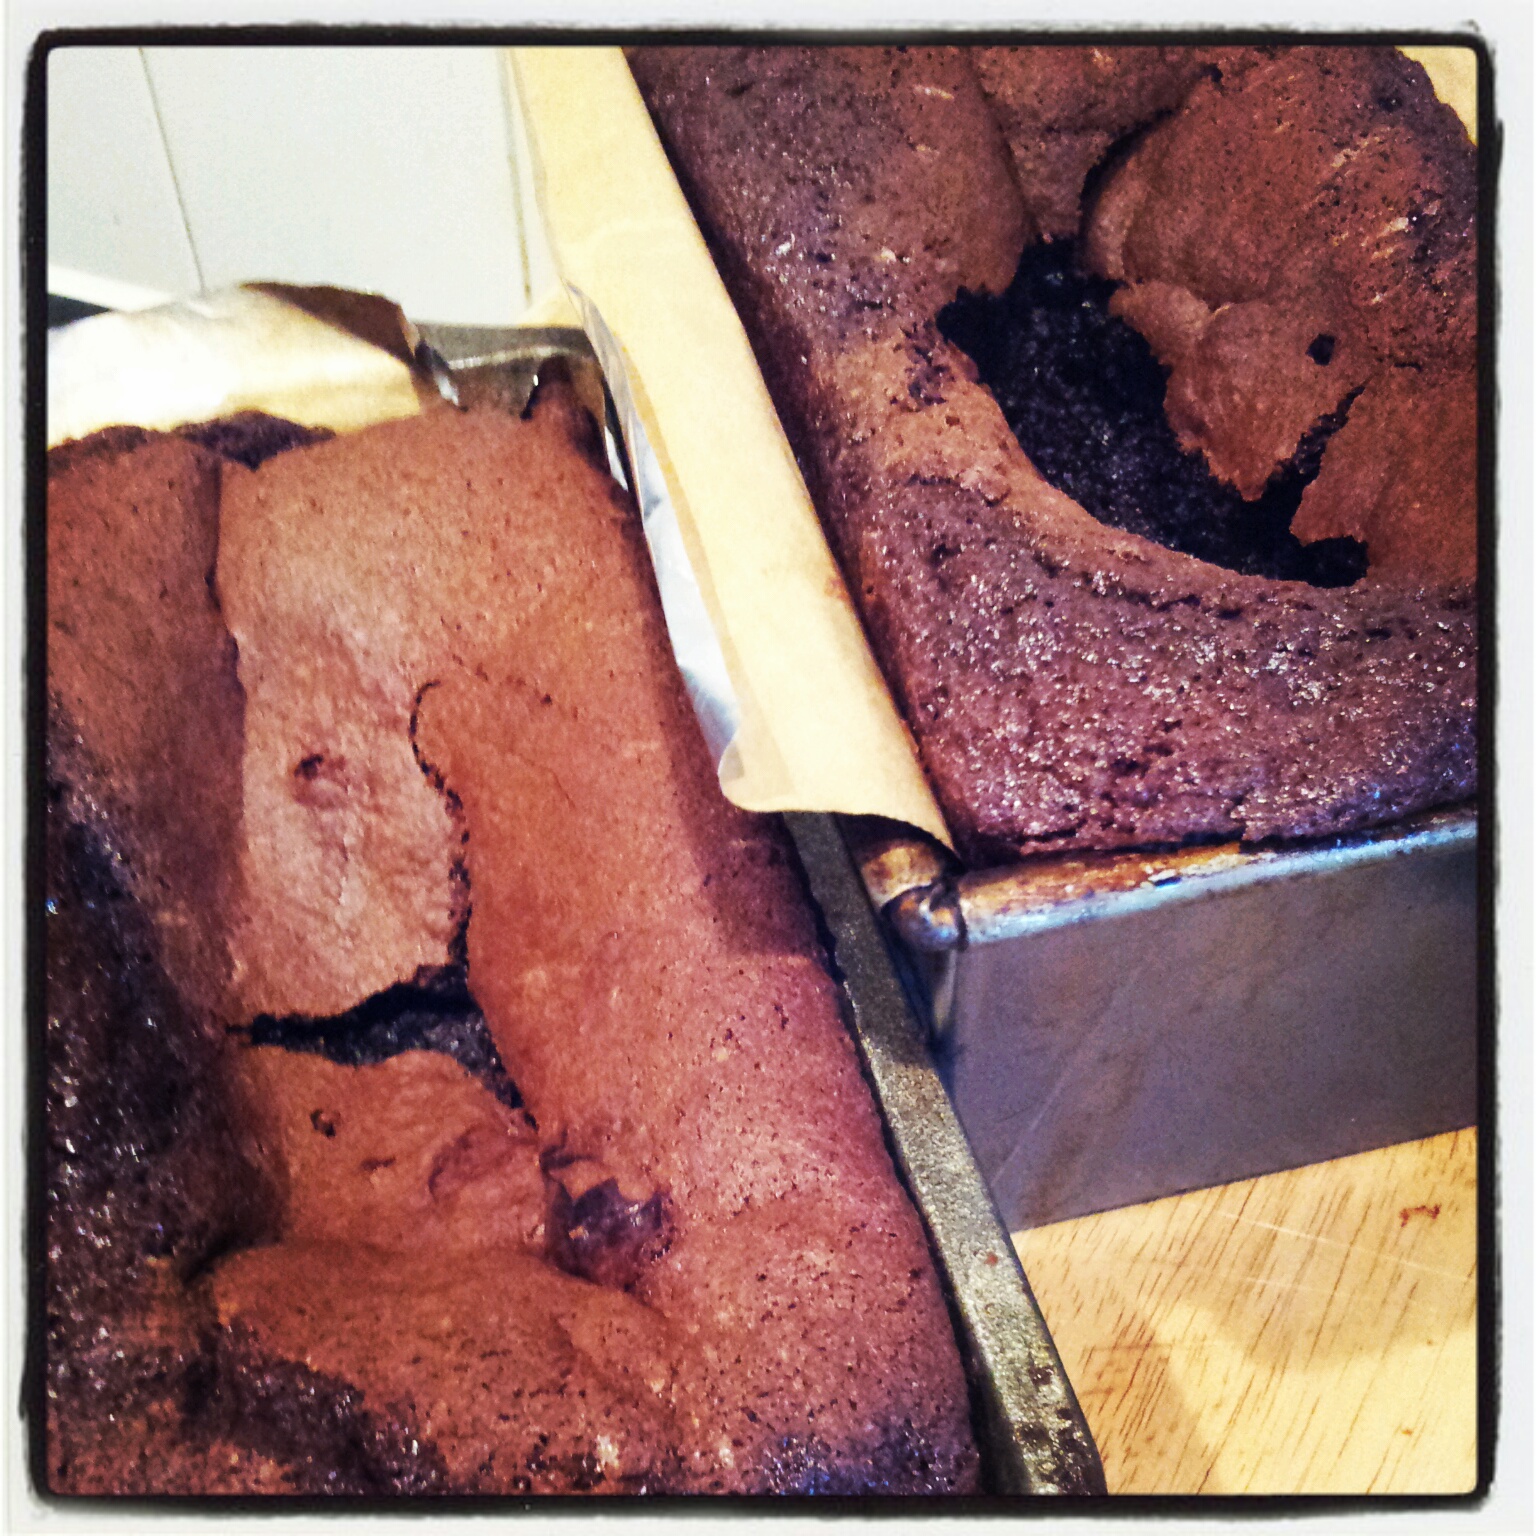
And here I am, writing it all again. Because it was a complete and utter disaster.  I was supposed to be making a special chocolate cake as a gift for an old colleague of mine.  So where better to turn than Short and Sweet, I thought?  No matter what I've made before, I've always had good results.  And even when I thought I had a good recipe beforehand (like with lemon cakes and banana cakes) when I've made a Lepard one, it's just taken the game to a whole other level (see Lemon and Poppy Seed Cake and Bare Banana Cake).  Not so with this one.

I just don't seem to have much luck with chocolate cakes.  I didn't like Nigella's chocolate cake.  I was disappointed with the Hummingbird chocolate cupcakes.  I don't want to tempt fate, but I've always had very good results with brownies.  But I can't hand on heart say that I've found a chocolate cake recipe that  does it for me.  My go-to recipe is the BBC Good Food Ultimate Chocolate Cake and I only didn't make that because of the complicated delivery method that this cake required.

There were rave reviews of the cake on Dan's forums and my lovely virtual friend Sadia of Baking Elements fame told me she'd never bake another chocolate cake after trying this one.  I didn't need convincing any further.

Because it's easier to take the iPad into the kitchen (Short and Sweet is a bit unwieldy) I found the recipe online and followed along with that.  Now, in hindsight, having just cross-referenced the book with the online recipe, I may have discovered where I went wrong...

Upside down and two slices in doesn't look so bad...
Lepard helpfully tells you in the book that the cake might sink due to the high ratio of fat and sugar to flour.  I picked this up when I read through the book version of the recipe and noted the remedy was to add two extra tablespoons of flour or an egg white.  Or both.  I added the extra flour so you can understand that I was even more disappointed when my cake still sank.  Actually that's not strictly true. I managed to sink two.  I mean one is careless, but two made me seriously doubt my ability to bake...

Because I wanted to share this nugget of information with you (the web version doesn't tell you this) I snapped a pic of the book recipe on my phone so I could have it at my side while I typed.  Then I decided to compare the ingredient list with the online one.  And it's significantly different in the flour area.

The version on the Guardian website was published in 2005.  Six years before the book.  The ingredient list looks the same at first glance until you get to the eggs.  The older recipe uses one egg rather than two and 50g less flour (before you add the extra two tablespoons recommended by the book) and the new recipe adds two teaspoons of glycerine although it unhelpfully doesn't tell you what difference this made.

With my Miss Marple skills working on overdrive,  I can only assume that with the inclusion of the codicil on saving the cake from sinking, Lepard has obviously come up with a slightly less risky version of the cake.  I picked the wrong one and ended up with not one, but two sunken loaves.

Third slice in and it just crumbled....
So my colleague will be a little gutted come Tuesday as the delivery service only happens once in a blue moon when all the stars align (if I'd posted the original blog, you would've understood that better) as I left it too late in the day to bake anything else and had no ingredients to spare.

I will write this one off as a lesson learned.  And if I'm honest, I'm not sure I'd make it again.  I cut the ends off of one of the loaves and served it with fruit and yogurt as dessert.  It was okay, but it wasn't all that in my humble opinion and didn't have the 'Wow!' factor that so many of Lepard's other recipes had.  Maybe if it hadn't sunk and I'd gone on to make the Treacle Chocolate Icing to top it with, I may have enjoyed it more.

Short and Sweet still remains my favourite go-to book of the moment.  But I would now advise caution when using some of the older online recipes.  If you own the book, it may be well worth checking for differences.

Monday, 7 May 2012

Lil Ms Squirrel's Hellman's Banana and Raspberry Blondies

I've written before about wondering how you can claim a recipe as being your own rather than someone else's.  I still don't quite understand the rules.  Having done a little research, opinion varies from website to website and person to person.  The most sensible advice I found was that if you change at least two ingredients (or quantities of an element - but not just doubling or halving the entire recipe) and then write the method in your own words, then technically you can claim the recipe as your own.

Cake for just 92 cals per piece?  Oh, go on then!
Of course, if you're a lovely and decent person, you might just want to provide references to books and if the recipe is online a link to it (or link to the book on Amazon or similar).  And if you're not lovely and decent then you probably should add references anyway - just in case the publisher comes a-calling with a nice shiny lawsuit.

I've tried to stick to this principle on my blog (although can't guarantee the earlier posts adhere to that because I never really thought about it at first).  And I hope that in doing this, the publishers have made the odd pound or two.  Certainly Fourth Estate who publish Short and Sweet have had lots of publicity from me on this blog now I've made 24 of Mr Lepard's recipes.  And given that I've since found the majority of them on the Guardian website where I could've gotten them for free, they were lucky to get £8 out of me.  Hell, I love it so much, I may even still buy the Kindle edition once my original copy falls apart.

Anyway, enough mentionitis about Short and Sweet.  On to my bake today.  Back in January when I decided to shed a few Christmas pounds, I found a recipe on the BBC Good Food website for 'Guilt Free Brownies' which I duly tried in this post.  I remember having seen this concept in an ad by Hellmans in a magazine and at the time thought 'Euuuuuw' but in my post Christmas desparation for something sweet and healthy and with a blog to write, I thought 'In for a penny, in for a pound'.  And they weren't actually that bad.  Less than 100 cals per piece and they freeze well too.

The cynic in me wondered if Hellman's had sponsored the recipe under the BBC banner given that the Beeb are now allowed to do product placement (I think?  Or is that just ITV).  But it was funny that the recipe specifically referenced Hellman's without saying 'Other low fat mayos work perfectly well too'.  And then I wondered if Hellman's had actually given the recipe.  But I've not seen it published in print since to compare like with like.  I just realised as I was typing I could check the Hellman's website - but I can't be bothered right now.

The not-so-secret ingredient.  Other mayos are available!
Moving on, now I've decided (again) that I need to address the amount of cake and other unhealthy stuff I eat, I thought this would be the ideal opportunity to make a recipe of my own.  I mean really make it.  Not just accidentally forget to add something that the recipe said I should and find that it either did or didn't really matter that I forgot.

So I decided to makeover the made-over brownies and see if they worked as blondies instead.  As blondies don't really appeal, the only recipes I've ever perused are in the Original Hummingbird Bakery book and Short and Sweet.  I couldn't tell you whether or not the Hummingbird ones contain banana, but Dan Lepard's do.  So I guess that this recipe could be kind of linked to his.  Except the only similarity is that they have bananas in.  Oh and whilst trying to figure out if I should use baking powder (like Dan does) or bicarb (like the Good Food recipe does) I noted that rather than mashing his bananas, he chops them.  So I did that too.  And, having spent several hours reading up on the pros and cons of bicarb vs baking powder vs the pH content of bananas in varying states of ripeness, I settled for baking powder.  End of similarity as I used more in the end.  If you want to make Dan's - which will no doubt work perfectly and taste amazing (but be full of calories), you can find the recipe here.

Chopped, not mashed.
In the end, I guess I cheated a bit by using the same quantities as the BBC recipe does for a lot of the ingredients.  At the end of the day, however, certain recipes always require certain components.  Like a Vicky sponge always having a ratio of around 60g of butter, sugar and flour to every egg you add.  Plus a bit of vanilla essence.  When I make these again, I may adapt the recipe slightly once more.  I might try a little more flour or a little less sugar.  I left out additional liquid as I was using fruit.  I used self-raising flour as it was all I had (poor planning!) and then I added extra baking powder after reading up on the need for cakes to be roughly pH neutral and that the riper a banana, the more alkaline it is - and the more chance you have of your cake not rising.

Interestingly, I also finally discovered why I detest things that have bicarb in them.  Apparently certain brands contain an aluminium component which some people can taste.  I must be one of them as many a good biscuit has been ruined for me with a slightly soapy taste, even when I've followed a recipe to the letter.

I digress.  Back to my recipe.  All in all, it worked out just about okay.  The brownies are a little too sticky for my liking. And a little damp underneath which I attribute to the raspberries.  If I make them again, I'd either use dried cherries or just serve the raspberries on the side of the plate with a brownie and a little dollop of low fat yogurt.  I doubt they'll keep for more than a day or two (they won't have chance to anyway!) and I won't try freezing them as I expect the dampness will spoil them when they defrost.

Defrosted bananas - not pretty!
I had also intended to use some bananas that I'd previously frozen and defrosted just for the recipe.  This is a really good thing to do if you've got bananas that are too ripe for eating - just freeze them and then use them in banana loaf recipes or for cookies (I used this technique for Dan Lepard's Banana Fudge Cookies).  But when I clocked the result of these ones, they looked so icky and brown on the outside that they just didn't seem to suit the blonde ethos so they have been used in another banana loaf for the hubby and I used fresh ones for this recipe.

But I did like them a lot.  The sponge is really lovely and vanilla-y.  I think next time I might use a little less vanilla, but it certainly wasn't offensive.  The chunks of banana were all lovely and fudgy when they were baked.  I also didn't get those horrid little brown streaks - so commonly seen in baked goods containing bananas.  Dan doesn't say if this is because the bananas are chopped rather than mashed, but I did read that it can be to do with the use of bicarbonate of soda causing a reaction with the bananas - another reason I went with baking powder instead as I think that's quite ugly, especially in a bake that uses white rather than brown sugar.

Having just polished off my third as I type, I realised that they actually taste just like a fruit trifle.  My stepfather would love them, with the vanilla being reminiscent of the custard and the sharp contrast of the raspberry representing the jelly.

And best of all, according to MyFitnessPal.com, they come in at just 92 cals per piece.  Even less if you use Hellman's extra light.  I cut mine into 16 pieces, which is plenty enough (I ate the three spaced over several hours).  But you could cut them into 12 for 123 cals each or be really greedy and cut them into eight large bars and it would still only be 184 cals.  Far healthier than some Lorraine Pascale Granola Bars I calorie counted the other day which tipped the scales at a whopping 504 cals each! (But the blondies are probably less healthy)

I would also consider using chopped macadamias - which I love - in place of the raspberries.  Using the same 75g quantity that Lepard uses in his recipe would add another 40 calories to the 1/16 blondie and if you went for making the toffee to encase the nuts, the extra sugar would add another 20 calories so you'd be looking at 152 cals per piece.  Still not bad for a small, sweet treat.  I am definitely going to try that on another occasion and will duly report back.

Well if you've gotten to here, you have the patience of a saint.  The recipe is coming up very shortly, but first, a couple of good links about the whole baking powder vs bicarb argument that I found whilst idly surfing at 4am this morning.

First is an excerpt from a book called The Farmer's Wife's Cookbook by Voyageur Press which came back as a Google Books search result (hopefully the link works for you).

Second is an article by Giovanna Zivny which delves into the chemistry a little more.

Finally (yes the recipe is coming!) I am hoping to get this included in Alphabakes, a monthly blog challenge hosted by Ros and Caroline.  Each month they challenge bakers to submit the product of baking recipes (of their own, or someone elses) that start with a particular letter.  I'm hoping to be cheeky and get these in under H for Hellman's.  Of course, other mayo brands work perfectly well!  Check out Caroline's great blog, 'Caroline Makes' where you'll find the round up of this month's challenge from the 25th onwards.

Right, on to the recipe!

Makes 16

  • 85g white chocolate, broken into squares
  • 85g self raising flour
  • 3/4 tsp baking powder
  • 1/2 tsp salt
  • 1 tsp vanilla bean paste (because I like the flecks, but vanilla extract is fine)
  • 150g caster sugar
  • 100g Hellman's light mayonnaise
  • 1 egg
  • 200g bananas, divided into four lengthways and then chopped into small pieces
  • 100g raspberries 


Really - serve these as a side rather than baking them in!

  1. Preheat the oven to 190c/170c fan/gas 5.  Line a 20cm tin with foil backed baking parchment (I use Lakeland's - but regular baking parchment will do)
  2. Put the chocolate into a medium sized bowl.  Add about an inch of water to a saucepan that the bowl will sit over (without the base of the bowl touching the water) and heat until simmering.  Place the bowl over the water and turn off the heat.  It's really important to melt white chocolate carefully as the low cocoa content can cause it to go grainy or burn.
  3. Once melted, leave to cool for about five minutes.
  4. Once the chocolate has cooled, beat in the vanilla and sugar.  It may go a bit grainy, but this is fine.  Beat in the egg and mayonnaise which will slacken off the mixture.  Don't worry if you have the odd small lump or two of sugar (but not loads!)
  5. Stir in the banana pieces then sift the flour, salt and baking powder into the bowl and mix until combined.
  6. Finally, carefully fold in the raspberries (or leave them out and just serve them on the side once the brownies are cooked).
  7. Pour the mixture into the prepared tin and level out.  You will need to scrape every last bit out of the bowl as this is a low fat recipe and bowl licking is prohibited.
  8. Bake for 30 minutes until well set but slightly wobbly in the middle.
  9. Cool completely before cutting into sixteen and serving.


Tuesday, 24 April 2012

Jaim's Chilli Chocolate Cookies

This recipe technically goes against my original purpose for this blog.  The idea was for me to use make better use of my cookbooks and to encourage my family to be more adventurous in their eating.  Along the way, I've used it as an excuse to work on my baking skills by churning out a fair few cakes and bakes and this recipe falls fairly and squarely into the category of what I'd call 'off-piste cooking' if I had my management-speak head turned on.

Since discovering Twitter, I've started following many fellow foodies and reading their blogs.  Consequently I think about food all the time, seem to always be hungry and eat far more naughty stuff than I ever used to.  This is why I am going to struggle to seriously lose weight before this challenge is over.  I have zero willpower.

Last week, I was seduced by these stunning looking biscuits from the lovely Jaim of Jaim's Kitchen.  I love Jaim's recipes - they're always so detailed in how she decided on the recipe and great advice on how to make the recipe succeed first time.  If more cookbook writers followed this format, there'd be an awful lot less dusty, unused cookbooks sitting on people's shelves.

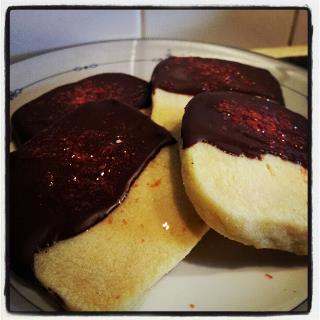
Glittery cookies
Her photography is also stunning.  I'm not normally seduced by girly, sparkly things but I just loved the pretty red glitter sprinkled on these cookies.  And I just happened to have some in my baking cupboard that was left over from Miss A's Christmas biscuits.  It was a sign.  I quite clearly had to make these biscuits because it would be wasteful to not use up the red glitter, wouldn't it?

Not that we ever have visitors to our house, but I do like the idea of having something you can whip out of the freezer at a moment's notice for a gift.  The recipe is generous enough to make some for now and put the rest of the dough in the freezer for a later date.  I am going home for the weekend so it will be nice to bake some early on Friday morning to bestow on my grandfather - although I may just dip those in plain chocolate.

The one bit I struggled with - and this is purely something I have to learn and practise at - was the dipping of the biscuits into the chocolate.  I didn't particularly give much thought to how deep the chocolate may or may not be in the ramekin that I melted it in.  Because I only had half the number of biscuits, I melted half the amount of chocolate.  But when I tried to dunk them in, it was probably only about a centimetre deep.  Cue a lot of faffing around and wiggling of part-dipped biscuits to try to get it to run further down.  I just about got there in the end, but mine aren't as beautifully neat as Jaims - you have to check out her stunning photography.

As for the taste test?  I adore the texture of these biscuits.  I was expecting them to be like shortbread, but they had a slightly chewier texture.  It's hard to describe but they were crumbly at the edges and had a really lovely bite in the middle.  I really love the dough and will use it time and again with other flavours.  I only used the coffee essence in the dough that I baked today so I'm thinking of maybe trying to make lemon sherbert to use with either dark or white chocolate on the next batch.  And the dough would definitely work with shards of ginger in it.

The chilli chocolate is a lovely touch.  At first I was worried that I'd maybe not used enough, but it gave the biscuits a lovely warm aftertaste without setting your mouth on fire.  I think even my mother - who hates anything spicy - would like these.

Definitely a keeper and good luck to Jaim with this entry into Bettie's Cookie Wars.  Thank you so much for sharing.  You can find the recipe here.

Sunday, 22 April 2012

Nigella's Bacon Brownies

For some reasons, lots of software developers seem to have an infatuation with bacon.  Don't ask me why.  I used to be a developer myself and I am partial to a bacon sandwich.  But some developers seem to worship the stuff.  To the point that the majority of their test user names and passwords are bacon related.  Or if they want to choose something different, then they'll use something sausage-related.  I have a password sheet in my desk drawer at work for all the test systems our developer has worked on and every single password on it is related to a pork product.
There really is bacon in there

Developers of a feather flock together.  We're (and I use we because I still consider myself part of this elite club) are generally thought of as long-haired nerds or weirdoes.  If you've seen Graham Linehan's IT Crowd, characterisation absolutely captures the stereotypical view of IT workers.  In fact, I am often referred to as being Moss' long-lost sister.  A little hurtful, but probably true.  I even used to sport that hairdo and I did once have glasses like that too.  I think that's why I get along so well with M and wanted to make this recipe just for him (well okay I had one too)

A few months ago, I came across a recipe for Bacon Jam from Not Quite Nigella.  M, our developer, was having a bit of a bad time and so I promised to make him some.  Of course, life got in the way and with me working at a different site for the last four months, I've not managed to keep my promise.  More recently, I happened across this recipe for Bacon Brownies on Twitter and just knew I'd found a recipe that might just go down a storm with everyone.  Or not.

Yep, I really did put bacon in there
I lined up the ingredients for the first shot and wavered a little when I realised that I had the makings of bacon and eggs and I was going to potentially be wasting that as a meal option plus a whole bunch of chocolate to boot.  Then I remembered my love for Canadian pancakes with crispy bacon and maple syrup and kept going.

The bacon was hard to dice finely so I snipped it into tiny squares, fried it off and then chopped it up with my big cook's knife once it was a bit crispier.  I substituted maple syrup for the golden syrup and, having forgotten I'd run out of bicarb, used 3 tsp of baking powder instead.  There was so much chocolate in the recipe that I was worried that the bacon flavour would be lost.

The finished brownies were beautifully soft and gooey and the salty nuggets of crisp bacon gave a wonderful contrast.  I'm not sure if you'd know it was bacon in there if you weren't told up front.  It could equally have just been flakes of sea salt.

Being a Nigella recipe, it's the antithesis of the Guilt Free Brownies I made back in January.  And of course, it's not veggie friendly.  But there are plenty of other brownie recipes on this blog for my lovely veggie friends to try.    

If you're looking for a talking point, it's definitely one to try.  You can find the recipe online at Emerald Street.  Hopefully M will appreciate them.  And another brownie-fearing colleague has also expressed an interest in trying one for the experience.  I'll update the blog with feedback later.  Oh and it'll be interesting to hear the husband's opinions too!  I won't be telling him what the secret ingredient is until he's finished eating it.

Update 23/04/2012 - Well the husband had a bacon brownie and was warned it contained bacon and he ate it without fuss, without gagging, without complaining.  His only comment was that it was more cakey and less fudgy than my usual brownies.  I am impressed!  I think it was just the sheer amount of chocolate that one him over.  As for M?  Well he took all six home to share with his cats.  I still await his verdict.

Bacon, eggs and chocolate
Bacon Brownies Recipe

  • 125g thin rashers of streaky bacon, scissored into small pieces and then chopped fine
  • 2 tsp of golden or maple syrup
  • 150g of soft unsalted butter
  • 250g of soft light brown sugar
  • 75g of best cocoa powder
  • 150g of plain flour
  • 1 tsp of bicarbonate of soda
  • 4 large eggs, beaten
  • 150g of dark chocolate, chopped, or dark chocolate chips/morsels
1. Preheat the oven to 190°C and get out a 25cm square tin and line it, or (as I prefer) a throwaway foil baking tray measuring 30cm x 20cm x 15cm.

2. Heat a heavy based (preferably non stick) frying pan and when warm, add the bacon bits and cook, stirring occasionally until beginning to crisp. Add the syrup, stir again to mix and transfer the sticky bacon bits to a cold surface, either on some foil or a plate. The syrupy bacon juices left behind are just delicious when mopped up with some bread: a cook’s treat!

3. Melt the butter over a gentle heat in a medium sized saucepan and when it’s melted, add the sugar, stirring with a wooden spoon.

4. Now take the pan off the heat and add the cocoa, flour, bicarbonate of soda and stir, then add the beaten eggs and stir again to mix.

5. Add the chopped dark choc or chips and the bacon bits, breaking them up with your hands if necessary. Fold together then pour and scrape into the tin.

6. Place in the oven to cook for 20-25 minutes; you want a little gooeyness inside still.

7. Transfer the tin to a wire rack and sit until cooled a little (but not to the point of coldness) and cut into 16 squares.

Saturday, 21 April 2012

James Martin's Chocolate, Satsuma and Mint Bread

Finished loaves
Before there was Dan, there was James.  I've had a thing for him since his bandana days, having first come across him when my Grandma used to watch Ready, Steady, Cook.  She had a soft spot for him too because he's an honorary Hampshire boy, even if his roots are in Yorkshire.  She always liked local people to do well.  I like him because I have bit of a thing for big Northerners who like food and fast cars.*

One of the best things that happened after having Miss A was being able to spend long, uninterrupted Saturday mornings watching Saturday Kitchen because I was "busy breastfeeding the baby, and it's takes far longer than bottlefeeding, don't you know".  And yet, until recently, I'd never once tried one of his recipes.

A few months ago, I bought a copy of James Martin's Masterclass for a fiver and then promptly lost it when the husband decided to go on a tidying jag.  Rediscovering it the other morning when I was pottering around the spare room on the daily work conference call (I was working from home and have to go in the spare room because I have a noisy lovebird next to my desk), a quick idle flick through turned up the recipe for Chocolate, Satsuma and Mint bread which seemed a great idea as I had leftover mint from making Lorraine Pascale's Minted Lamb Burgers earlier this week.

Pretty colours
The book itself professes on the front cover to "Make Your Home Cooking Easier".  This recipe may have been easy, but it had me on tenterhooks for a while.  It starts out with a basic bread dough, although only uses 200ml of water to 500g of flour which made a very dense and unyielding dough.  Having fully subscribed to Lorraine Pascale's mantra of 'the wetter, the better' (although you do have to have a limit!), this seemed entirely the wrong thing to do.  He even comments in his basic white bread recipe that 'where most people go wrong is in not making the mixture wet enough and so the finished bread ends up too doughy and dry'.  Curious.

Looking at his recipe for basic white bread, I noticed that he only uses 250ml water to 500g flour for that too.  And uses double the yeast that most other bakers use (2x7g sachets of easy yeast rather than one or 25g of fresh).  But he doesn't explain why.  And this is why I love Short and Sweet so much because Dan takes the time to explain why more yeast would make a difference (I should run downstairs and look this up right now! although I do know that you should only use half the yeast if you plan to leave the dough to rise overnight in the fridge)

Anyhow, scepticism over my very doughy dough aside, it doubled in size as predicted within the hour.  And then came the near disaster.  The recipe states "carefully mix the chocolate chips, mint leaves and satsumas in by hand".  All well and good.  Except it does nothing to prepare you for the slimy mess that ensues when you try to work tinned satsumas into such heavy dough.  Although it does explain why he used less liquid in the dough because suddenly, my work surface was swimming in juice.

Slimy work surface
I'd left my oranges to drain in a sieve for about ten minutes, but in my mind, they weren't quite dry enough.  If I was making this again, I'd definitely pop them onto some kitchen paper to remove some of the additional moisture.  I'd also try and have the sense to work the dry ingredients thoroughly into the dough first and then prod the satsuma bits in later.

As it was, my dough ripped with each attempt to ensnare the chocolate and orange and juice was leaking everywhere.  At one point, I was fully prepared to just sling it all in the bin and write it off as a waste of ingredients, but it seemed a shame to waste all the chocolate chips.

I finally managed to get them onto the tray, vaguely shaped and floured.  They rose beautifully for the second rise, were baked and came out actually looking like the ones in the book.  I was disappointed that the lighting in my kitchen was so poor again today as the photos don't do them justice.

Of course, Miss A who is addicted to home made bread (see sconegate) absolutely loved it.  So did I.  The husband took a bite and screwed up his face.  "I don't like that" he said.  "Why?" "Well I don't like it.  You don't like red wine but you don't give a reason why."  "Erm, because it gives me a stinking hangover and I don't like the tannins in most reds.  Plus you NEVER share so I don't get the chance to ever form a proper opinion"  He couldn't come up with a suitable reason for not liking the bread until I revealed it had mint in it.  "Ah, that's it" says he.
Just about salvaged for the final rise

It didn't stop him from eating the whole slice, nor did it later stop him from polishing off a quarter of the loaf before tea because he'd missed  lunch.  So it's obviously not that bad.  Just nicely different.

In fact, I really enjoyed the orange and mint combination.  If you get a mouthful with both flavours at the same time, it's really refreshing and zingy and works well with the bitterness of the dark chocolate.  I will definitely be making this again next time I have some spare mint.  And I like that it makes two loaves so one can (hopefully) go in the freezer.

And, for the first time in months, I've managed to use a baking recipe from somewhere other than Short and Sweet and actually enjoy it.  I need to do more of this!

Recipe - makes two smallish loaves

  • 500g strong white flour, plus extra for dusting
  • 8g salt
  • 40g caster sugar
  • 50g butter, diced and softened
  • 25g fresh yeast or 2x7g fast action yeast
  • 200g dark chocolate chips or dark chocolate chopped into small pieces
  • 10 mint leaves, roughly chopped
  • 1x250g satsumas or mandarin oranges, drained and lightly dried with kitchen paper


Fresh from the oven

  1. Sift the flour and salt into a large bowl, then add the sugar, butter and yeast.  Pour in the water, a little at a time and begin to mix by hand until you have a dough that is sticky but pliable.  Try not to make the dough too stiff as this will result in a hard loaf of bread once cooked.  Add a little more warm water, if needed, to ensure that the dough remains pliable.
  2. Place the dough on a lightly floured work surface and knead for ten minutes, then mould into a ball and place in the bowl.  Cover with a clean, damp tea towel and set aside to rest somewhere warm for 1 hour or until it has risen and doubled in size.
  3. Knock the dough back lightly and tip it out on to a floured work surface.  Knead in the chocolate and mint leaves until evenly distributed.  Carefully work in the satsuma pieces.
  4. Divide the dough into two equal portions.  Shape into a rugby ball shape and flatten slightly.  Place the loaves on a floured baking sheet with the folds in the dough underneath.  Sprinkle with flour, then score the top with a sharp knife and place somewhere warm for another hour to double in size again.
  5. Meanwhile, preheat the oven to 220c/200c fan/ Gas 7.
  6. Bake the loaves in the oven for 25 minutes.  They are cooked when the base of each loaf sounds hollow when you tap it.  Remove from the oven and place on a wire rack to cool.


*I would just like to add, that they have to be reasonably good looking too.  I can't stand Jonny Vegas.

Thursday, 29 March 2012

Lil Ms Squirrel's New Petits Pots au Chocolat

Over the years, the husband how to read the signs that I will give in and let him have a takeaway for tea.  Frazzled is usually the best sign and as this occurs on nearly a daily basis, he probably gets away with it far more often than he should.

Today was one such day.  After a full on day at work and a childcare crisis that the husband had to deal with as I was forty miles away presenting a project close-out to the board, the idea of not having to cook two separate meals - or even one - really appealed.  Of course, once I gave in, this left me without a recipe to try.  And with only thirty minutes to research one that I had the ingredients for whilst we waited for the takeaway to arrive, my options were limited.

So, I decided to try re-inventing one of my own staple recipes.  Many years ago, I adapted a recipe for petits pots au chocolat because I found the chocolate flavour too intense (this was back in the day when chocolate choice was limited to Dairy Milk or Bournville - yes, I'm that old!).  The recipe called for melted dark chocolate to be mixed with egg yolks and then whipped egg whites to give a light and fluffy mousse.  In my wisdom, rather than using milk chocolate, I decided to lighten the flavour by adding copious amounts of whipped double cream.  And very nice it is too.  Although you can feel your arteries hardening as you eat it.

From 100g of chocolate, three egg yolks, four egg whites and 300ml of double cream you can make two lard-arse portions or with other ingredients, turn it into a really nice dessert to feed four.  My usual dessert recipe contains the mousse layered with brownies and cherry compote.

But for a while, I've been thinking about getting the recipe back more to its original state but retaining some of the richness of the added cream.  So tonight, with a fridge full of half used pots of Greek yogurt, I figured I'd see if I could make something slightly healthier.  I also wanted an excuse to use the little espresso cups the hubby bought me for Christmas back in 2005 and that I'd forgotten about.  They're perfect for presenting mini desserts in.  Expect to see them appear on the blog again before the year is over.

I began with 40g of 70% dark chocolate, which I melted in the microwave on a low temperature until it was just melted but not too hot.  On our 700 watt microwave, this was 40% power for 4m 30s.  And in doing this, it meant I didn't have to wait for it to cool before I beat in the yolk of one egg.

Whilst the chocolate had been melting, I whipped two egg whites until they formed soft peaks.  I then added a tablespoon of the whipped egg whites into the chocolate mixture to slacken it off, before pouring the chocolate mixture into the bowl of egg whites and folding with a metal spoon until just fully combined.  Finally, I added two rounded tablespoons of low fat Greek yogurt and mixed.  I probably could have added more to make the dessert go further, but I wanted to get the richness of the dairy, without that tang you get from yogurt.  At this level, the tang didn't come through.  I'm sure a bit of experimentation on the ratios will find the tipping point in the taste - it's a tough job, but I'll force myself to taste test it one day in the future.

An hour of setting time in the fridge, and voila, a perfectly light, creamy chocolate dessert - enough to satisfy a craving without the heart-attack inducing effect of my original recipe.  Mostly because the mixture fills two espresso cups, which you can't fit many calories into anyway.  Of course, it's highly adaptable and lends itself to being flavoured either with spirits or by using a flavoured chocolate in the first place.  A mint fondant bar would work well, as would a spiced orange flavoured one.  I'd also like to try using chilli chocolate or the one you can get that's laced with sea salt.  The possibilites are endless and the prep time is minimal - probably only seven or eight minutes, plus chilling if you're well organised.

So after six months of blogging, this is the first recipe from me to you rather than me trying someone else's recipe, which is technically not what I started out to do - but then the Greek yogurt in my mousse makes it a new recipe to me.  Happy eating!

Makes 2 espresso cups-ful

  • 40g 70% chocolate, melted and cooled
  • 1 large egg separated plus 1 large egg white
  • 2 rounded tbsp low fat Greek yogurt


  1. Whisk the egg whites to soft peak - this is the point when the bowl can be turned upside down without them sliding out.
  2. Mix the egg yolk into the cooled chocolate until glossy.
  3. Add a tablespoon of the whisked eggs to the chocolate and mix to slacken the mixture.  Pour the chocolate mixture into the remaining egg whites and fold gently together using a metal spoon until just combined and there are no traces of egg white.  Fold in the yogurt.
  4. Pour into a piping bag (it makes filling tiny cups easier) and pipe into the espresso cups.
  5. Chill for an hour before serving.


Related Posts Plugin for WordPress, Blogger...