Tuesday, 20 December 2011

Moroccan Spiced Cauliflower and Almond Soup

Cauliflower soup is my all time favourite soup.  Most people turn their noses up at it - especially as it has a bit of a tendency to smell - but for me it's in my top five comfort foods.  My mum used to make it all the time when I was small and I can't think of anything better than a piping hot bowl of cream of cauliflower soup with deep fried croutons.

In fact, I think it was the croutons that got me eating the soup.  She used to make a huge pile of them and then hide them in the cupboard out of reach.  I have hazy memories of snaffling a few each time I walked past the cupboard and then when tea time rolled around, there being none left and trying to explain that it was Herbie Hedgehog who ate them.

Cauliflower itself, has a very delicate flavour and so most people associate it with the watery, overcooked texture of chain carvery restaurants and school dinners.  Or with it being slathered with a pile of cheese sauce (another favourite of mine) thus rendering it as a low fat bulking agent rather than an ingredient in its own right.
Topped with flaked almonds, harissa and chilli oil

Even my mum's soup requires a fair bit of seasoning and the addition of leeks and celery to give it some depth of flavour otherwise it is just bland.  A while back, as part of this challenge, I tried making Stilton and Cauliflower soup.  Quite honestly, it was foul.  The stilton overpowered the subtle flavours of the veggies and all in all it was a complete waste of good ingredients.  Don't get me wrong, I like a bit of stilton with some bread or biscuits for cheese.  But a bowl of runny, smelly-sock scented paste did nothing for me.

That's the other thing about cauliflower based soups.  They can get really thick and require a lot of thinning down.  When I make my mum's soup, I just chuck in piles of veggies, a litre of stock and a pint of white sauce and it usually tastes pretty much the same, regardless of the cauliflower size.  But seeing as how this challenge was to use a recipe, I followed it to the letter.

Ocado sent me the world's largest cauliflower last week and so despite the recipe saying 'One large cauliflower', I feel that this particular cauliflower fell into the same large category as The Enormous Turnip.  The soup was nearly thick enough to cut and I ended up adding another pint of liquid to it, just to get a reasonably soupy consistency.

On the plus side, the flavours were amazing.  Harissa-spicy with the subtle flavour of coriander, cumin, cinnamon and toasted almonds, whilst still retaining the cauliflower undertones this soup really tickled my tastebuds.  And as the husband was having curry, I ate the soup with one of Dan Lepard's Frying Pan Naans which worked really well.

Recipe from BBC Good Food January 2012


  • Cut 1 large cauliflower into small florets.
  • Fry 2 tbsp oil, 1/2 tsp each of ground cinnamon, cumin and coriander and 2 tbsp harissa paste for 2 mins in a large pan.
  • Add the cauliflower, 1 litre hot vegetable or chicken stock and 50g toasted flaked almonds.
  • Cover and cook for 20 minutes until the cauliflower is tender.
  • Blend soup until smooth, then serve with an extra drizzle of harissa and a sprinkle of toasted almonds.

Monday, 19 December 2011

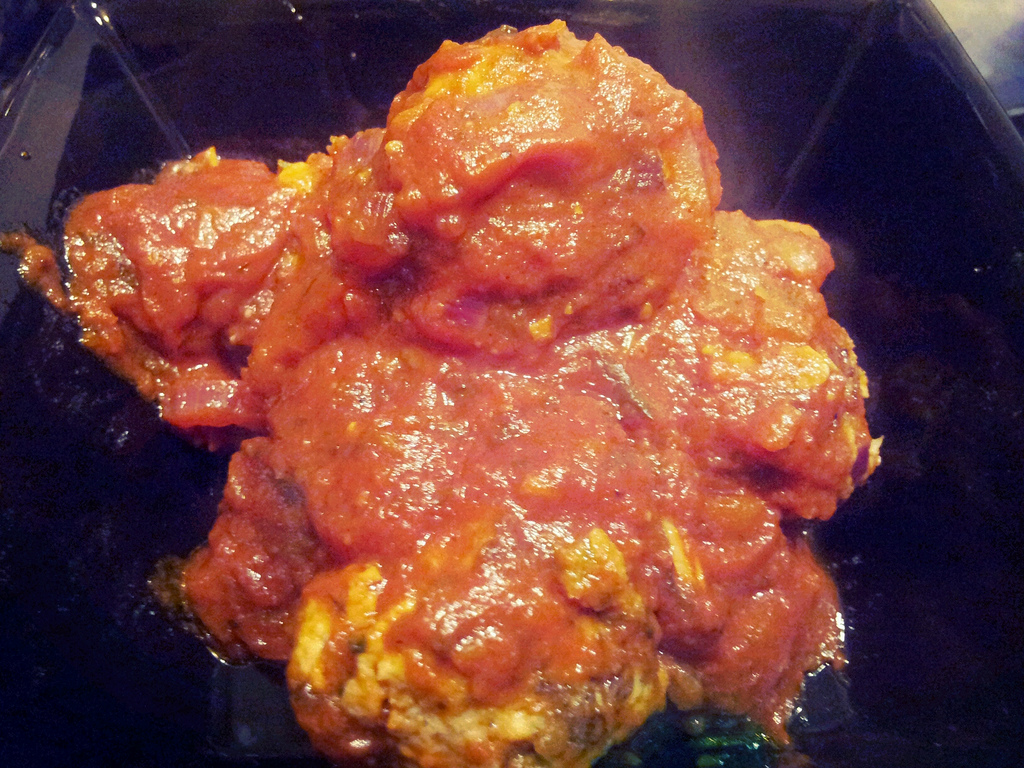
Meatballs with Spicy Chipotle Tomato Sauce

There's no two ways about it.  Meatballs are hard to photograph.  Especially when your as pants at photography as I am.  You'd think I'd know a thing or two, being married to award-winning, professional photographer @LCCPhotography.  But all his good advice goes in one ear, hangs around for a day or two and then flutters out the other with a few more memories.

He honestly does despair with me and my lack of skill with a camera.  I want to be good, really I do.  But it's one of those things.  There's no point in competing because I don't have the inherent artistic vision required to take good photos.  I just about remember the rule of thirds.  I've learned to make sure I don't cut appendages off of people (in photos!).  I know that the aperture setting affects the depth of field (although goodness knows what it means).

They're in there...somewhere...
I have a DSLR.  I was getting into using it and then I got pregnant so it's been packed away from small sticky fingers.  He bought me a compact with all the twiddly knobs and a gazillion settings.  I wanted a point-and-shoot because with a toddler, there's no time to faff around and figure out if you want it on aperture or shutter priority.  So I now own a camera that not only has program mode (ie semi automatic) it has intelligent-auto (read numpty) mode.  You point and shoot.  You can turn the flash on or off.

And yet still, it sits on my desk most of the time, out of the way of the detritus littering another evening in the kitchen trying out a new recipe whilst trying not to forget the chicken kiev (shop bought) and garlic bread (also shop bought) that's in the oven for the husband's dinner.  At least we won't have a vampire calling round our house tonight.

So the pictures of tonights recipe were taken on my phone.  People rave about the Samsung Galaxy S2 but having owned an iPhone, quite frankly I don't like it.  The camera sucks.  The shutter is so slow that I often miss the moment with Miss A.  Although sometimes I capture something that I wasn't expecting which can be a bonus.  Pictures with the flash are awful unless you're taking pictures of slumbering toddlers in the pitch black.  And it doesn't have Instagram.  Flickr isn't bad, but it's still not quite as good.

But having tried photographing meatballs before, and failing miserably, I knew I didn't stand much chance on the creativity front tonight.  There's no easy way to get at them if you're serving them in a bowl.  And they're usually under a pile of sauce - which is probably for the best because they're ugly little blighters.

S
Ugly little blighters, pre-cooking

So after that rather long-winded excuse for my poor photography, on to the recipe.  I chose this recipe because it uses pork mince.  I'm really not a fan of pork.  I'll eat sausages and I'll eat bacon, but I've never liked pork since I was a kid.  There was just something about fatty roast pork on Sundays and pork chops mid week that still turn my stomach at the thought even today.

The meatballs appealed though as something to try for Miss A (she's having hers tomorrow night).  She refuses meat but will occasionally eat a bite or two of sausage or beef meatball so I'm hoping they're the best of both worlds for her.

The meat - unusually for a lot of meatball recipes I've tried - was beautifully seasoned and tasty.  I think (whispers quietly) that the husband might even eat these without complaining.  The sauce was great to.  It is a combination of passata, onions, garlic and chipotle paste.  The recipe called for a tablespoon of chipotle paste, but rather sensibly, I clocked the 'hot' label on the bottle and only used a teaspoon.  Even that made my eyes water so goodness knows the BBC Good Food team must have asbestos tongues.

I had this with pasta just because that's what the husband was having with his kiev (strange combination, but he likes it) but I think it would have worked better served with rice or some of Dan Lepard's lovely corn oil tortillas.

Another keeper.  (From BBC Good Food Magazine, Jan 2012 issue)

Serves 4


  • 500g pork mince
  • small bunch of coriander - leaves and stalks chopped separately (I used Garden Gourmet coriander paste)
  • 2 handfuls fresh breadcrumbs
  • 2 medium red onions, 1 quarter finely diced, the rest sliced
  • 2tbsp vegetable oil
  • 2 garlic cloves, chopped
  • 400ml passata
  • 1tbsp chipotle paste (I used 1tsp Discovery Hot Chipotle Paste)


  1. In a small bowl, mix together the pork, breadcrumbs, egg,finely chopped onions and the chopped coriander leaves.
  2. Season, mix well and shape into small meatballs.
  3. Over a medium heat, add 1 tbsp of the oil to a large frying pand and brown the meatballs on all sides, then remove from the pan and set aside.
  4. Add the remaining oil, sliced onion, garlic, coriander stems and some salt.  Cook for 5 mins.
  5. Add the passata, chipotle paste and 100ml water.  Stir well then simmer for 10 mins before adding the meatballs and cooking for a further 5 mins.
  6. Serve with rice or warm tortillas


Sunday, 18 December 2011

@Dan_Lepard's Marbled Chocolate Crumb Cake

Some of the sixteen pieces
Let me state for the record.  Short and Sweet by Dan Lepard.  Best. Baking. Book. Ever.  End of.  Sorry Mary Berry.  You'll always have a place in my heart but I was won over by the Frying Pan Naan of all things and everything I've baked so far has just worked to perfection.

I could go on and on and on about this book.  Anyone who mentions baking to me now is told to go and buy a copy of it.  It's so wonderful, it's in Amazon's top 100 this week and personally I think it should hit the top ten.

And I'm not just saying it because the lovely Dan replied to one of my tweets earlier when I said I was going to write a blog about the cake.  The book is a bit like Cuprinol.  It does what it says on the tin.  It's short.  And sweet.  Well the recipes are.  The book is a delightful romp of so many recipes that I'm thinking of taking myself off to a hotel for a week for peace and quiet to read it from cover to cover.

Ready for the oven. Parchment cutting skills fail me
Take today's recipe.  I've baked a pile of goodies to take in to work tomorrow to celebrate my birthday on Wednesday.  I was supposed to have last night free to bake to my heart's content.  The husband was off out for a night on the tiles.  The child was in bed.  And then the dishwasher blew the electrics and my baking was limited to a batch of cookies.

So with a Bakewell to make today, I wanted something quick, easy and unusual to add to the pile.  I've been eyeing up the Marbled Chocolate Crumb Cake ever since the book came.  A quick scan of the recipe made it look pretty easy and I figured I could fit it in to the couple of hours when the husband was supposed to be at the studio and the child was asleep.

And I almost made it in time.  Except the husband arrived back just as the cake was about to go into the oven and in my haste to pretend I was tidying the kitchen, I forgot to do the marbley bit.  See the husband hates me baking.

I'm not a tidy baker.  I wish I could be one of those organised people with little dishes full of carefully measured ingredients.  But that takes too long and would generate far too much washing up (not ideal when your dishwasher's just blown up).  So instead, I pull packets and jars out as I need them and then spend the rest of the time trying to jiggle things around so I have some work space and to not fall over the dog who loves to sit right under the counter, hoping I'll push one thing and the ensuing chain reaction will tip something tasty into his waiting paws.
Messy kitchen

The cake went into the oven and 30 seconds before the first timer, the child woke up and insisted she wanted to help put the crumble topping on.  Luckily most of it made it into the pan and there's only a half-inch or so to clean off the top of the hob.

Once the cake had cooled, it cut beautifully and it is honestly the lightest and airiest tray bake I've seen in I can't remember how long.  I'm absolutely desperate to try a bit.  But I had to make do with a little bit of crumb that fell off whilst I was cutting and even that was divine.

It's now packed and waiting to be taken to work for the hungry hoardes tomorrow.  I doubt it will hang around long.  And I'll definitely be making this one again.

Crumb topping
You can find an adaptation of the recipe here - far more beautifully illustrated than I was able to manage despite being married to a professional photographer.  The original recipe doesn't mix the chocolate with cream.  You just stir chopped chocolate into the chocolate cake mix so nice and simple - and less washing up.  Only other mistake was to not let it cool completely.  The chocolate was still slightly runny - I was too impatient as always.  I'd say leave it a good 3-4 hours if you can resist temptation - but I'm sure it's equally amazing slightly warm with some ice cream on the side.

Thanks again Dan.  Can't wait to try out more!
Someone didn't marble it very well....
Close up of the cake

Lyn Bone's Bakewell Tart

Well this particular post isn't a new recipe for me (that post is coming later tonight), but I just wanted to blog about it because it's rather dear to my heart.

I've never really been a fan of Bakewell because I find it ridiculously sweet.  The jam never tastes of anything other than red, sticky stuff and its usually got icing on the top too.  Another one of those tooth-rotting recipes.  Plus sponge and pastry together.  Sometimes I'm a bit fussy like that.  In the way that I still, at thirty-something years old, won't eat pudding and custard in the same bowl.  An indulgence my grandmother started and my mother still despairs at to this day.  In some ways, that's a bonus because having gained a sweet tooth with the birth of my daughter, I'd probably be more likely to eat pudding in the canteen at work but they won't indulge my pecadilloes.  It's pudding with custard or go hungry.  Some people are so harsh!
Bakewell tart

Anyhow one day when I was expecting, I was at my mum's and she had the spoils of the cakes left over from her contribution to some do or another.  She proffered a piece of her bakewell and despite my initial reticence, I gave in to baby's will and ate it.  It was amazing.  What makes the difference is that she uses Polish cherry jam from Lidl.  That's jam from Poland.  Not jam made from polished cherries.

Because the jam is so fruity and sharp, it cuts through the sweetness of the sponge.  And my mum doesn't ice her Bakewell - topping it instead with baked almonds.  And she uses almond sponge rather than frangipane.  All of which goes to making a delightful Bakewell.

A while later, my boss was on a no-chocolate kick and we had a bake sale at work so I chose to make the Bakewell to make sure he stumped up and bought some.  He had the first slice, declared it the best Bakewell he's ever eaten and it sold out in about two minutes flat.

Polish Plum Jam
Since then, it's been a regular request from the people at work and I'm baking it today as part of my birthday celebration.

Somehow though, I've managed to mislay two jars of the prized cherry jam between here and Winchester so I had to buy an emergency jar of Polish Plum Butter from Tesco this morning.  Again, amazing flavour - I had a little taster out of the jar just to check I shouldn't plump for Bonne Maman blackcurrant instead.

As for the recipe, this is my version.  I've tweaked it a little by adding ground almonds and a little almond essence to the sponge, but it will always be my mum's recipe.  Her topping recipe is based on the weight of three eggs.  You weigh the eggs and use the same amount of sugar, flour and butter.  I find that three eggs-worth is always a bit to much but two eggs-worth is not enough if you're using a nine-inch tin.  So for the sake of simplicity, I've put the actual weights in the recipe as my eggs weighed 175g today, but do try the egg-weight method.

Makes a 9" tart


  • 1 qty shortcrust pastry - I used Dan Lepard's recipe which you can view here
  • 175g softened butter
  • 175g caster sugar
  • 3 eggs (rough weight 175g)
  • 175g self raising flour
  • 50g ground almonds
  • 1tsp almond essence
  • 2tbsp milk
  • half a jar of Polish cherry jam or other flavour of your choice
  • 50g flaked almonds


Essential equipment - 9" loose bottomed flan tin


  1. Preheat the oven to 180c/160c fan/gas 4
  2. Roll the pastry to 5mm thick and large enough to cover the base and sides of your flan tin.
  3. Line the tin with the pastry, prick the base over with a fork, add a circle of parchment weighed down with baking beans and bake for 25 mins.
  4. Meanwhile, cream the butter and sugar in a large bowl until light and fluffy.
  5. Beat in the eggs one at a time, adding 1tbsp of the flour with each addition to prevent curdling.
  6. Add in the almond essence then beat in the almonds and flour and 2tbsp of milk.
  7. Remove the baking beans and parchment and bake for a further 10 minutes.
  8. Remove the pastry case from the oven, cover the base with the jam and then top with the sponge mixture.
  9. Sprinkle the sponge with the flaked almond.
  10. Change the oven temp to 190c/170 fan/gas 5 bake until golden and springy to the touch - approx 25 minutes.
  11. Leave to cool in the tin until completely cold then transfer to the serving dish.

Saturday, 17 December 2011

Chocolate Nutella and Sea Salt Fudge

The idea behind this blog was that I'd spend my time working through some of the piles of recipe books that I already own and actually make use of them.  Nearly three months in and having become a regular on Twitter, I've now been seduced by one too many food blogs and find myself obsessing about some of the recipes that I see there; the cookery books are now gathering dust in the corner.


Heart attack in a bowl
Yesterday during a bit of blind panic about edible gifts, I happened across a recipe for Chocolate Nutella and Seasalt Fudge on the Tasty Kitchen blog.  I love fudge and if someone ever wanted to give me an edible gift, it's exactly what they should choose.

If they really wanted to please me, they should bring the tooth-rottingly sweet Scottish tablet.  I adore that stuff.  My teeth and my blood sugar don't.

To really make fudge though, you need a sugar thermometer.  It saves all the faff of trying to work out just when the sugar reaches soft ball stage by dropping blobs of hot fudge into cups of cold water.  However, it's essential to buy a decent one.  I bought my first (and only so far) from eBay.  I picked a good vendor with high ratings.  I read reviews on other websites about the thermometer I chose - it was a glass thermometer inside a protective glass tube.  I used it to make my very first batch of jam - it worked perfectly and I had no need for the wrinkle test.  I decided to make Baileys fudge for a gift and the darn thing shattered into my pan of beautiful fudge.

What a waste of good ingredients.  I did think about trying to sieve the bits out but thought I'd be faced with a lawsuit.

The finished fudge
And there ended the fudge making.  Hopefully Santa has listened to my pleas for a digital thermometer because I really want to give some of Dan Lepard's sweet recipes - especially his beautiful fruit jellies as illustrated by the lovely Sadia, blogger at bakingelements.com 

But this recipe appealed because even though it's more of a truffle-style fudge than a true fudge, there's no need to heat it precisely.  You just stick all of the ingredients over a bain marie, mix til melted and refrigerate.  Simples.

It really is as easy as that.  It helps if your toddler doesn't decide to wake up and scream the house down just as you're pouring the fudge into the tin so mine was a little rustic looking.  It also definitely needs the salt to cut through the sweetness.  Because my expensive Next salt mill broke a while back (Next household gadgets are rubbish - our kettle and toaster broke and the colour has come off of our bread bin) the only sea salt I had was in one of those shop-bought mills where you can't take the lid off to refill it so I had to grind it to get it out.  The salt was finer than I would've liked so it looked a little snowy on the top, but it was definitely needed.

I was also pleased that the delicate nutty flavour came through in the aftertaste.  I actually used Sainsburys own Belgian hazelnut spread which I've found doesn't have that nasty plasticky taste that Ferrero hazlenut and cocoa products have.

It makes a fair few pieces.  I didn't count but at least 64 if you cut it into inch squares.  Just be wary of oversampling!


  • 1 tbsp butter for greasing
  • 1 can (375g) sweetened condenced milk
  • 1 tsp vanilla extract
  • 200g high quality chocolate, chopped into small pieces
  • 300g Nutella at room temperature (although I prefer Sainsburys Belgian Chocolate and Hazlenut Spread)
  • 3 tbsp softened unsalted butter cut into cubes
  • ½ tsp sea salt 


  1. Grease the bottom and sides of an 20cm square tin with butter. Line the pan with parchment paper, leaving a 2-inch overlap on the sides.
  2. In a medium glass or stainless steel bowl, stir together sweetened condensed milk, vanilla, bittersweet chocolate chips, Nutella, and butter.
  3. Form a double-boiler by setting the bowl over a medium pot of gently simmering water. The water level should be low enough that the bottom of the bowl does not touch the water. Stir until the chocolate chips are melted and the mixture is smooth, 5 to 7 minutes.
  4. Scrape the mixture into the prepared pan, spread the top smooth with a spatula, and sprinkle with sea salt. Refrigerate until the fudge is firm, at least 2 hours.
  5. Once the fudge is chilled, run a knife under hot water, dry it off, and run it around the edges of the pan to loosen the fudge. Using the overhanging parchment paper, lift the fudge out. Peel off the parchment paper. Cut the fudge into 3/4-inch squares. Store in the fridge in an airtight container or wrapped well in plastic wrap and foil.

Friday, 16 December 2011

Food Bloggers Unplugged


Yesterday I was tagged by the lovely Alison of Hungry Squirrel Cakes to take part in Food Bloggers Unplugged... the persona behind the blog.

So if you want to find out more about the weeble behind 366 Recipe Challenge, read on!

What or who inspired you to start your blog?

Me and my little foodie

It was my cousin, the lovely @BridestockBride.  She started her blog about her impending nuptials and on Fridays has a feature called Foodie Friday.  The recipe that really inspired me to start my challenge was the first thing ever cooked for her by her fiance (Mr Bridestock) - Chorizo and Butter Bean Stew.

Who is your foodie inspiration?

My mum taught me to cook although a lot of my earliest food memories involve hanging around my grandmother whilst she made pies and crumbles waiting for bits of Bramley dipped in sugar for 'her little donkey'.

All my staples are from my mother - spaghetti bolognaise being my favourite - but now as I'm getting more into cooking, they have the 'Lil Ms Squirrel' twist.  The most popular recipe she's ever given me is her Bakewell tart which everyone I make it for always raves about - especially my current boss.

Sleb chef wise, I'm a fan of Thomasina Miers, Dan Lepard, Mary Berry, Lorraine Pascale and Nigel Slater.  Not necessarily in that order - it changes with my mood.  I also have a bit of a crush on James Martin.  It's something about Northerners who like fast cars and food that does it for me.

If there's one chef that's not inspired me, it's St Delia as I've tried several of her recipes and only been pleased with the results of one.

Your greasiest most batter splattered cook book is?

My oldest friend is Mary Berry's Complete Cookery Book, however these days it's my phone or the husband's iPad that tends to be in the firing line of food splatter.  Mostly so that I can research and take the odd photo whilst I cook.

The best thing you have ever eaten in another country, where was it and what was it?

I have a dream to go on a foodie world tour and eat in lovely restaurants in Spain, Italy and Mexico to name but a few.  I'd also love to go to Canada although I'm not aware of anything particularly foodie from Canada other than their pancakes.

I've not travelled that much since I've been older and more into food. And being married to someone who eats to live rather than lives to eat, my opportunities have been limited.

My favourite eating country so far has to be France because of the pastries and the crepes and the beautiful savoury galettes in Brittany and the way they know how to cook a decent steak even in the crummiest of hotel restaurants.

Another Food Blogger's table you would like to eat at?

From one squirrel to another, it would have to be Alison of Hungry Squirrel Cakes' table.  Especially if she's making lasagne :)  And then pudding either with Weekly Bake Off  or Maria of Maria's Kitchen.  Or maybe afternoon tea with Nelly of Nelly's cupcakes.  So many food blogs, so little time!

What one kitchen gadget would you like Santa to bring you? (money no object)

I'm such a sheep, but I'd love a KitchenAid in Boysenberry or Lime.  However if money is no object, I would love a new kitchen full stop, please Santa.

Who taught you how to cook?

My lovely mum who gave up her career as a pastry chef when she had me at 22.

I'm coming to you for dinner, what is your signature dish?

Chicken, leek and mushroom pie.  I stole this recipe from an ex and now pass it off as my own.  It involves lots of pastry and double cream.  Served with lightly steamed asparagus.

What is your guilty food pleasure?

Bacon flavoured Walkers crisps followed by Maltesers - but they have to be the ones that come from a box.  The ones in the packet just don't taste quite the same.

Reveal something about yourself that others would be surprised to learn?  

I don't like pizza.  I love bread, I love cheese, I love all the toppings.  But if I have to go to somewhere like Pizza Express, I'll always have the non-pizza option.

And now I have to tag five other Food Bloggers to answer these questions:

Cupcake Dad

The Bridestock Wedding (come on, we've not had a blog from you for AGES!)

Kitchen Bitching

Make, Bake and Sew

Baking Making Etc

Dan Lepard's Easy White Bread

First ever dinner
Today's blog is the start of an ongoing experiment with what makes my favourite white loaf.  In my book, there is nothing nicer than a warm, crusty white loaf slathered in butter with a good piece of cheese on the side.  And although I have a good basic white bread recipe of my own, I wanted to understand more about the nuances of loaf making and what I can do to get a crustier, slightly darker bake without losing the lovely soft inside.

This is something I'd been wondering for a while ever since I regularly got into baking bread a year or so ago.  When I weaned my daughter, I discovered baby-led weaning which is basically the slummy mummy's way of feeding your child.  You give them finger sized bits of food to chew on.  None of this nonsense of pureeing mountains of orange-coloured veggies, only to end up wearing half of it.  In fact, my daughter's first official dinner was spaghetti bolognese (unpureed) and she loved it.


Ready for the oven
With bread being such a staple, I was disappointed to find that shop bought bread has so much salt in it and of course bread from a real bakers (not that we have one here in the back end of beyond) doesn't come with nutritional information so I figured the only way to monitor her salt intake from bread was to make my own.

Reading up on the subject, even St Delia (of whom - shock horror - I am not a fan) has resigned herself to the fact that you need some salt in bread to give it flavour and it affects the rising action of the yeast.  Different bakers will tell you to put different amounts of salt per 500g of flour - the most shocking I found was in a Paul Hollywood Cheese and Onion Loaf that required 15g of salt on top of the salt already coming from the cheese.  I reduced that one to 10g and it was still to salty for me.  Dan Lepard has written about the subject of salt in bread and the need for taste vs the need to reduce salt in our diet.  He ends by saying "Use salt respectfully"  Sound advice.

Anyhow, with the help of my Prospero, I had the basic white loaf down to an art form in a few attempts.  To make this even easier, you can do the first rise in the fridge overnight.  This is my recipe, the blog for today continues below.

Makes one 2lb loaf

  • 500g strong white flour
  • 1 sachet easy yeast
  • 1 tsp salt
  • 1 tsp sugar
  • 30 ml olive oil
  • 300ml warm water (I use 200ml ice cold water and 100ml boiling water)


  1. Put the dry ingredients into a bowl and stir to combine.
  2. Make a well in the centre and pour in the liquid.
  3. Either mix in a freestanding mixer with a dough hook for 5 minutes or mix by hand and knead for 10 minutes.
  4. Leave to rise for 1 hour in a warm place.
  5. Remove the dough from the bowl and shape as desired or place into a lightly oiled 2lb loaf tin
  6. Leave to rise for 45 minutes
  7. Bake at 220c/200c fan for 30 minutes
It's really that simple.

But for me, the crust was never quite crusty enough or dark enough.  I've been wondering why this is because I gave this same recipe to my mum and she (sometimes) gets that lovely slightly dark crust to the top.  Was it our different ovens?  I know she uses her Kenwood to mix so it wasn't necessarily woman vs machine.  She does prefer Canadian bread flour.  I tried that.  It didn't really make any difference.

And then I got my copy of Short and Sweet.  And the preface to the first set of recipes discusses what to add to your loaf and what difference it makes.  Do you use water or milk?  Butter or oil?  Sugar or not?  Should you use steam in your oven (or will it blow up!)?  So many variations, all to make a simple white loaf!

So I decided just to follow Dan's easy white bread recipe, see what the outcome was and tinker from there.

Boy, I'd forgotten what a faff hand baking can be when you're trying to do it around a toddler who clings to your legs plaintively wailing 'Abbbeeeeeeeeee MIX!'  It's my own fault for teaching her to cook at such a young age.  As soon as she could sit up, I'd let her sit on the work surface and watch her bread being made so a year on from that she thinks that she should be involved in anything I cook.  Both a joy and a curse when there are hot things about.

Finished loaf with Nigel Slater's lemon curd
The first mix reminded me of Lorraine Pascale's bread making mantra 'the wetter, the better'.  I guess because I normally use the prospero to knead my bread, I don't get involved in the wet and sticky stages.

Although Lepard says bread doesn't need too much kneading, this little fella had to be mixed then kneaded three times at ten minute intervals before a 45 minute rise, before shaping and another 45 minute rise before cooking.  By the end of it, I wasn't sure that it really was an easy white loaf.  In fact it was just a tiny blob of dough (most of it was stuck to my hands despite me oiling them) that didn't have the big rise I'm used to with my usual loaf.

When I removed it from the oven, the crust seemed so hard that I was worried I'd over-baked it - I still don't have the measure of my new oven just yet.  Temptation got the better of me. Before the poor thing had even had a chance to think about cooling, I'd whipped out my bread knife and carved off a chunk.  Slathered it in butter.  Result.  Hot, chewy insides with a perfect crust.

Still being slightly in doubt of the result, I cut a second piece under the auspices of testing out the lemon curd I made the other day.  I'd read that home made curds only keep for a couple of weeks due to the egg content which makes them start to separate.  But I can vouch for the fact that Nigel Slaters lemon curd is still good some three weeks after opening and even better on Dan Lepard's easy white bread.

Was it really easy?  Well maybe I need to rebrand my own loaf the 'Lazy White Loaf' and then yes, this was pretty easy.  Next step to try tinkering with it.  I'm sure there'll be another blog about it soon.

Dan Lepard's Easy White Bread

  • 400g strong white flour, plus extra for shaping and dusting
  • 1 teaspoon fast action yeast
  • 1 teaspoon fine salt
  • 300ml warm water
  • oil for kneading
  1. Put the flour, yeast and salt in a bowl, pour in the warm water and stir everything together into a sticky shaggy mass. 
  2. Scrape the dough from your hands, cover the bowl with a cloth and leave for 10 minutes. 
  3. Lightly oil a 30cm area of the work surface and your hands, and knead the dough lightly for 10 seconds, repeating twice more at 10-minute intervals. 
  4. Return the dough to the bowl and leave it for 45 minutes. 
  5. Wipe the work surface, dust it with flour then pat the dough into an oval. Roll it up tightly, give each end a pinch to keep it neat then place the dough seam-side down on a floured tray, cover with a cloth and leave until the dough has increased in size by a half – about 45 minutes. 
  6. Heat the oven to 220°C/200°C fan/425°F/gas 7. 
  7. Flour the top of the dough, cut a slash down the middle and bake for 35-40 minutes.
Related Posts Plugin for WordPress, Blogger...